

IP & Country Blocker — Security & CAPTCHA Configuration Guide
This documentation explains how to configure Security protections, Cloudflare Turnstile CAPTCHA, and Google reCAPTCHA to work seamlessly with the IP & Country Blocker plugin. These features help protect your website from bots, abuse, and unauthorized access while ensuring a smooth user experience for legitimate visitors.
Cloudflare Turnstile CAPTCHA Configuration
Requirements
Before starting, ensure the following:
- Your website is added to Cloudflare
- You have access to the Cloudflare Dashboard
- WordPress admin access
- IP & Country Blocker plugin installed and activated
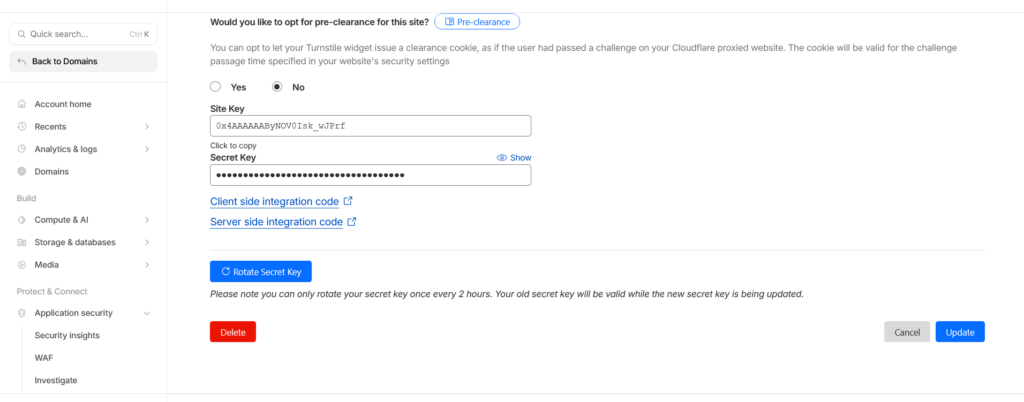
🛠 Step 1: Create a Turnstile Widget in Cloudflare
- Log in to your Cloudflare account
https://dash.cloudflare.com - Navigate to
Turnstile → Add Site - Enter the required details:
- Site Name: Any descriptive name
- Domain: Your website domain
- Widget Mode:
- Managed (recommended)
- Non-interactive
- Invisible
- Click Create
- Copy the generated:
- Site Key
- Secret Key
⚠️ Keep the Secret Key private.
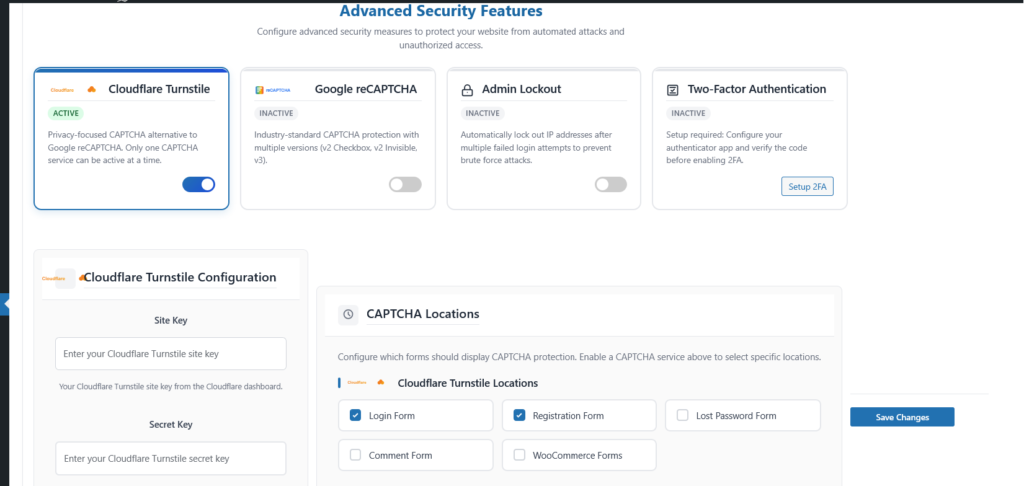
Step 2: Configure Turnstile in IP & Country Blocker
- Go to WordPress Dashboard → IP & Country Blocker → Advanced Security
- Select Cloudflare Turnstile as the CAPTCHA provider
- Enter:
- Turnstile Site Key
- Turnstile Secret Key
- Choose the verification mode (if available)
- Select Captcha Locations
- Click Save Changes
Google reCAPTCHA Configuration
IP & Country Blocker Plugin
Google reCAPTCHA protects your website from spam and automated abuse by verifying whether visitors are human. The IP & Country Blocker plugin supports reCAPTCHA v2 and reCAPTCHA v3.
Requirements
- Google reCAPTCHA account
- Website domain added in reCAPTCHA Admin
- Site Key and Secret Key
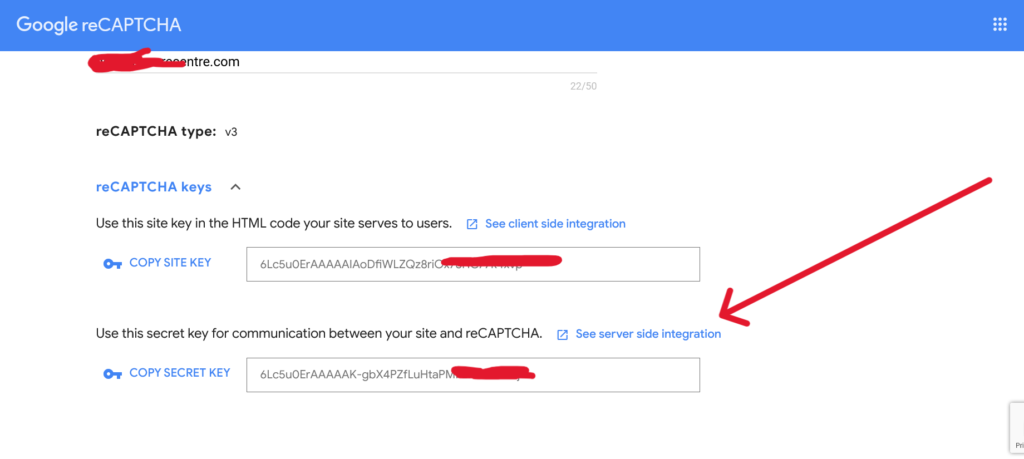
Setup Steps
- Go to Google reCAPTCHA Admin
https://www.google.com/recaptcha/admin - Register your site and select:
- reCAPTCHA v2 (Checkbox)
- or reCAPTCHA v3 (Invisible)
- Copy the Site Key and Secret Key
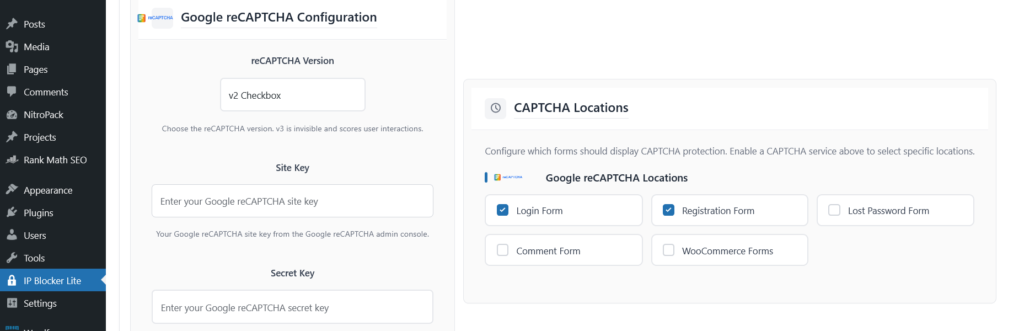
Plugin Configuration
- Open WordPress Dashboard → IP & Country Blocker →Advanced Security
- Select Google reCAPTCHA
- Choose v2 or v3
- Enter:
- Site Key
- Secret Key
- Save settings
Two-Factor Authentication (2FA) Setup
IP & Country Blocker Plugin
Two-Factor Authentication (2FA) adds an extra layer of security to your WordPress account by requiring a second verification step during login. Even if a password is compromised, unauthorized access is prevented.
Supported 2FA Methods
The IP & Country Blocker plugin supports the following 2FA options:
- Email-based One-Time Password (OTP)
- Authenticator App (TOTP)
(Google Authenticator, Microsoft Authenticator, Authy, etc.) - Recovery Codes (backup access)
Requirements
- WordPress administrator access
- Valid email address (for Email OTP)
- Authenticator app installed on your mobile device (for App-based 2FA)
⚙ Enable 2FA in the Plugin
- Go to WordPress Dashboard → IP & Country Blocker → Advanced Security
- Open the Two-Factor Authentication (2FA) section
- Enable 2FA Protection
- Choose your preferred 2FA method:
- Email OTP
- Authenticator App
- Click Save Settings
Authenticator App Setup
- Select Authenticator App as the 2FA method
- Scan the displayed QR code using your authenticator app
- Enter the 6-digit verification code generated by the app
- Confirm to activate 2FA
Once enabled, a time-based code will be required during every login.
Email OTP Setup
- Select Email OTP as the 2FA method
- Save the settings
- On next login, a one-time code will be sent to your registered email address
- Enter the code to complete login
🔑 Recovery Codes
Recovery codes allow you to access your account if you lose access to your 2FA device.
- Generate recovery codes from the 2FA Settings page
- Store them securely (offline recommended)
- Each code can be used once
Emergency Recovery
If you are locked out:
- Use a valid recovery code
- Or use the Emergency Recovery URL (if enabled)